Extending Data Model
Prerequisite:
- Access to a CDF Project.
- Know how to install and setup Python.
- Launch a Python notebook.
In this tutorial, we will show you how to extend a data model using the CogniteCore model as an example.
Creating the Base Model
The CogniteCore model is an immutable model versioned by Cognite. To extend this model we first create a copy of it
in our own space, such that we can start to do modifications to it.
from cognite.neat import NeatSession, get_cognite_client
client = get_cognite_client(".env")
Found .env file in repository root. Loaded variables from .env file.
neat = NeatSession(client, verbose=True)

neat.read.cdf.data_model(("cdf_cdm", "CogniteCore", "v1"))
Neat Engine 2.0.4 loaded.
Succeeded with warnings: Read NEAT(verified,physical,cdf_cdm,CogniteCore,v1)
| count | |
|---|---|
| NeatIssue | |
| NotNeatSupportedFilterWarning | 7 |
Hint: Use the .inspect.issues() for more details.
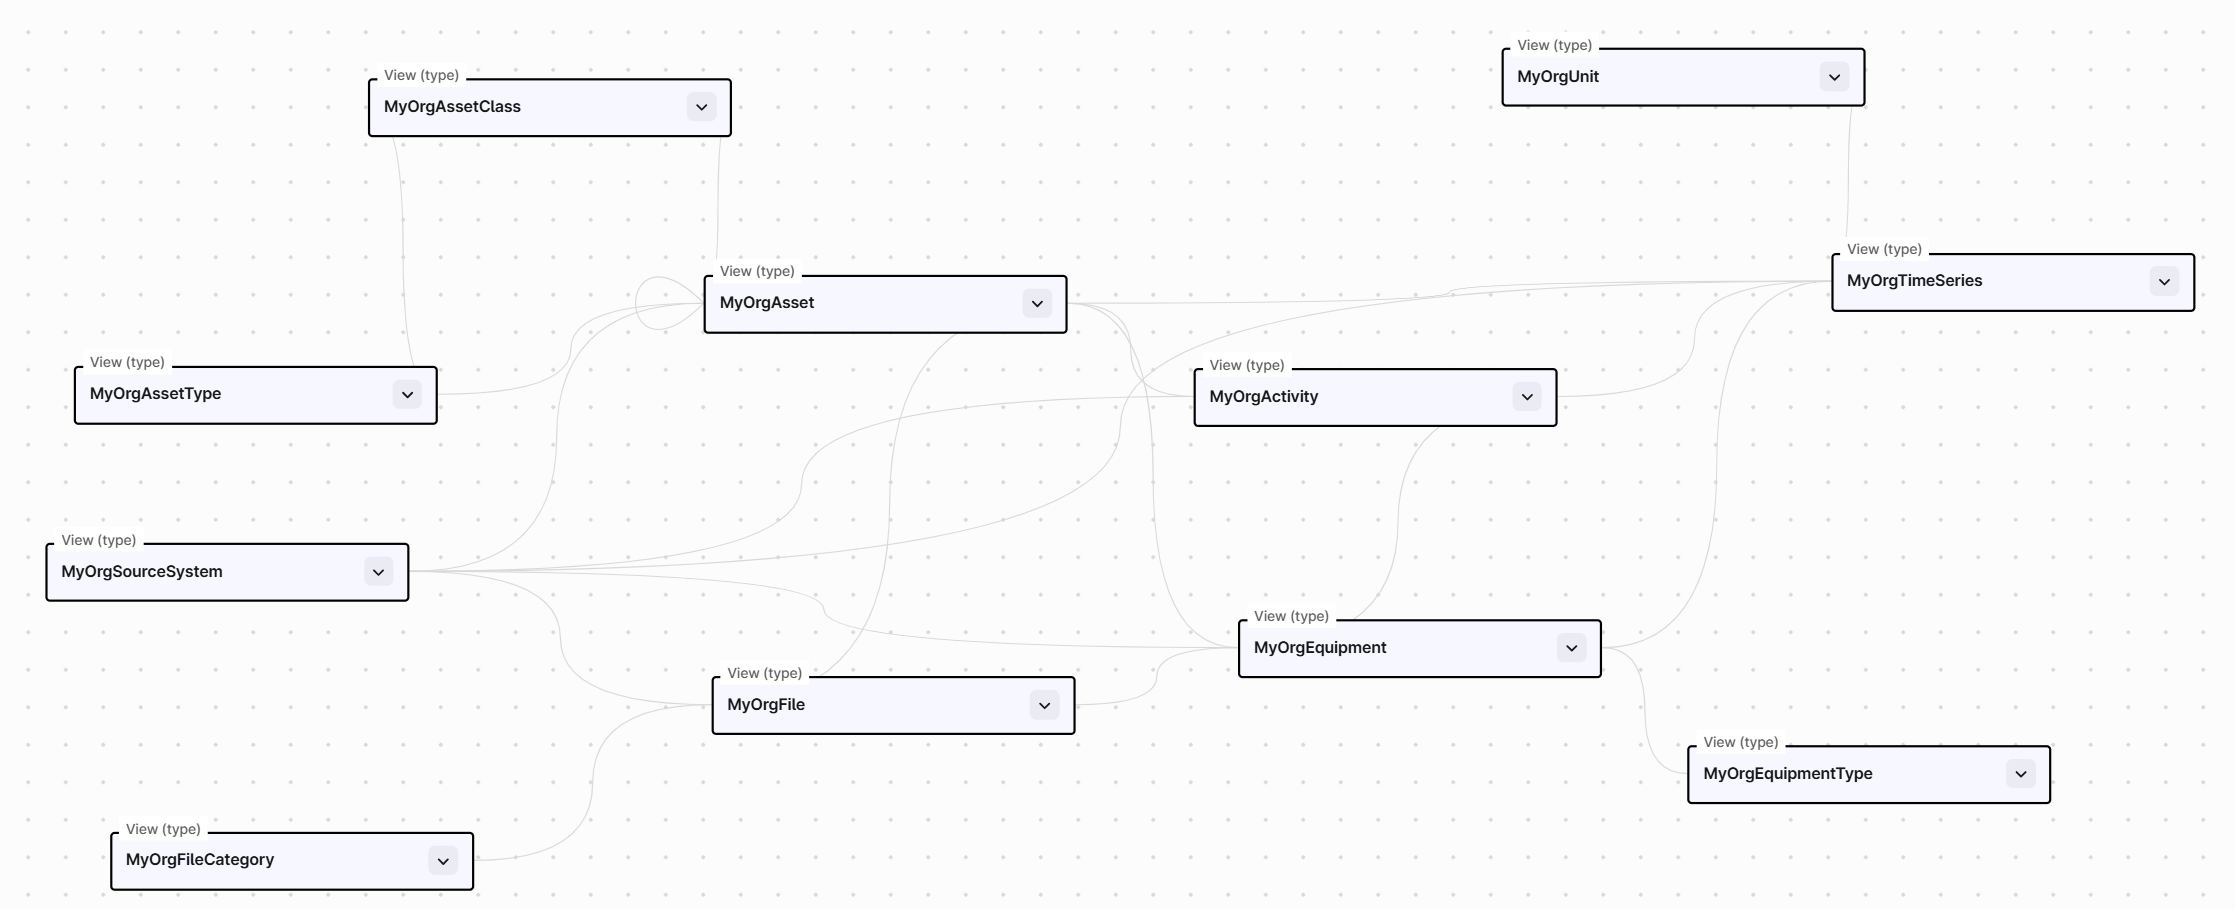
We have now downloaded the CogniteCore model.
The CogniteCore model consists of 33 views, including views for 3D, Annotation, as well as several views that are used as interfaces.
We simpliy the core model by dropping these views.
neat.drop.data_model.views(group=["3D", "Annotation", "BaseViews"])
Dropped 22 views.
Success: NEAT(verified,physical,cdf_cdm,CogniteCore,v1) → NEAT(verified,physical,cdf_cdm,CogniteCore,v1)
Next we will turn the CogniteCore model into the basis for our new model Enterprise model. This means
we are creating an extension from the CogniteCore.
neat.template.enterprise_model(data_model_id=("enterprise_extension", "ExtensionCore", "v1"))
Success: NEAT(verified,physical,cdf_cdm,CogniteCore,v1) → NEAT(verified,physical,enterprise_extension,ExtensionCore,v1)
Note that we set move_connections=True. This repeats all connections in the CogniteCore model and updates the value type to match our new types.
We can show the results by using the show.data_model() method.
neat.to.excel("enterprise-ext.xlsx")
neat.show.data_model()
http_purl.org_cognite_neat_data-model_verified_physical_sp_doctrino_space_ExtensionCore_v1.html
The new enterprise model is now ready. We can now publish it to CDF
neat.to.cdf.data_model()
You can inspect the details with the .inspect.outcome.data_model(...) method.
| name | unchanged | changed | created | deleted | |
|---|---|---|---|---|---|
| 0 | spaces | 1 | 0 | 0 | 0 |
| 1 | containers | 10 | 1 | 0 | 0 |
| 2 | views | 10 | 1 | 0 | 0 |
| 3 | data_models | 0 | 0 | 1 | 1 |
| 4 | nodes | 0 | 0 | 0 | 0 |
Or we can dump it a spreadsheet and work on it from there.
neat.to.excel("my_extension.xlsx", include_reference=True)
Adding New Properties
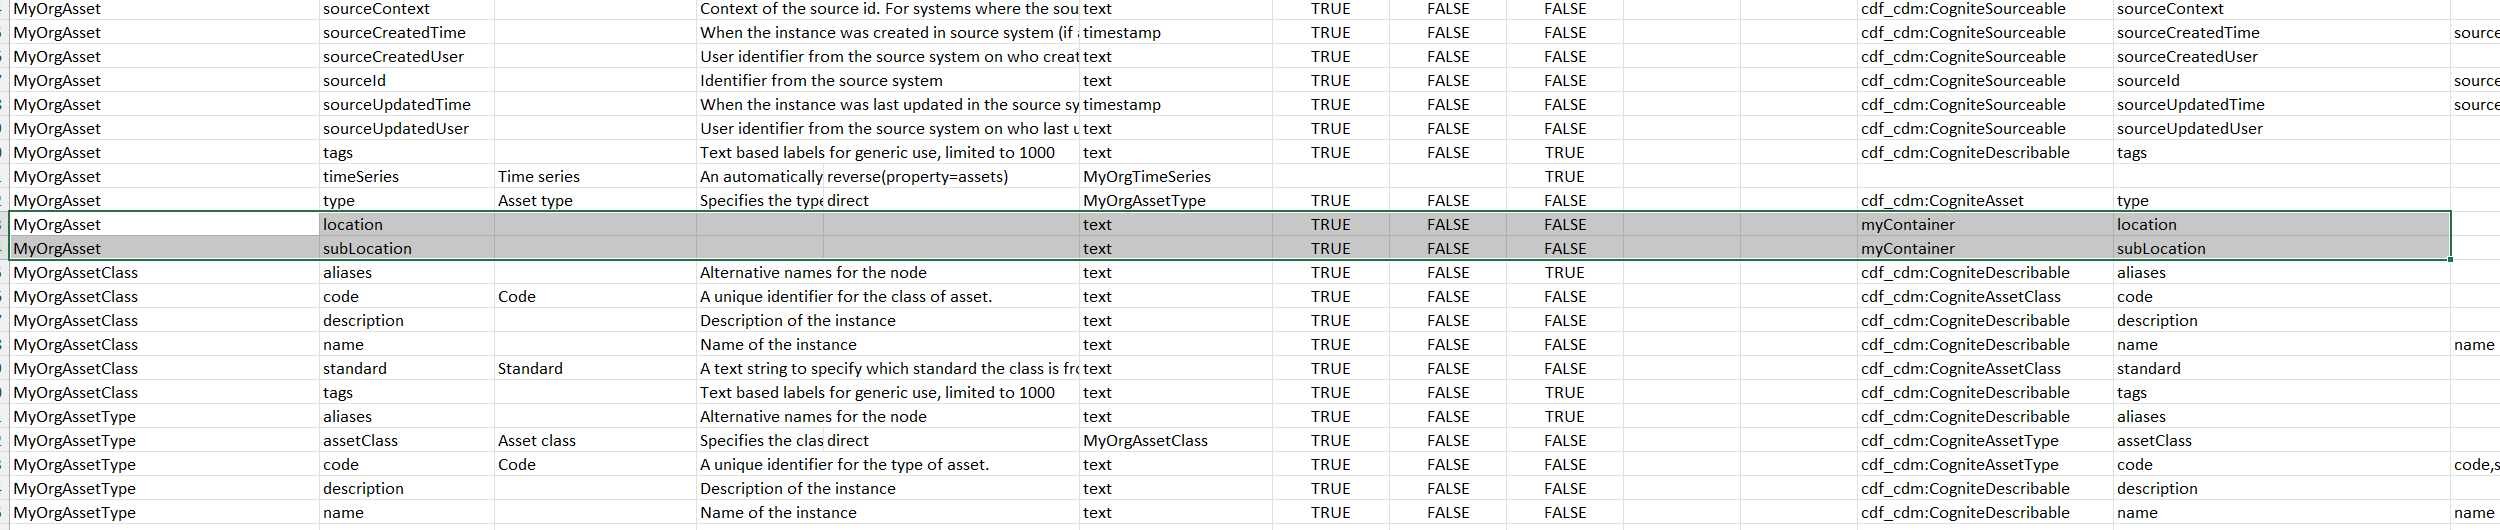
In the spreadsheet, we have added the two properties location and subLocation to the Asset view. In addition, we have added our on container myContainer in the container sheet.
We start a new NeatSession to load this new model publish it to CDF
neat = NeatSession(client)
Neat Engine 2.0.3 loaded.
neat.read.excel("my_extension.xlsx")
Success: Read NEAT(verified,physical,sp_doctrino_space,ExtensionCore,v1)
We redeploy the model, and force deploy if there are any conflicts and accepts losing data if we need to.
neat.to.cdf.data_model(existing="force", drop_data=True)
You can inspect the details with the .inspect.outcome.data_model(...) method.
| name | unchanged | changed | created | deleted | |
|---|---|---|---|---|---|
| 0 | spaces | 1 | 0 | 0 | 0 |
| 1 | containers | 10 | 1 | 0 | 0 |
| 2 | views | 10 | 1 | 0 | 0 |
| 3 | data_models | 0 | 0 | 1 | 1 |
| 4 | nodes | 0 | 0 | 0 | 0 |
This new model is now published to CDF with the two extra properties

Deleted space []