Introduction
Prerequisite:
- Installed Neat, see Installation
- Launched a notebook environment.
In this tutorial, we will give an introduction to the neat interface NeatSession.
Creating a basic NeatSession
We start by importing a NeatSession and instansiate it with a CogniteClient. Note that we can run a NeatSession without a CogniteClient, but this will limit the capabilities we have.
from cognite.neat import NeatSession, get_cognite_client
client = get_cognite_client(".env")
Found .env file in repository root. Loaded variables from .env file.
neat = NeatSession(client)
Neat Engine 2.0.3 loaded.
neat
We note that we can always write neat in a cell to get information about the current session we are in, as well as hints about what we can do next.
We not that we now have an empty session and are ready to start.
What is the NeatSession
NeatSession is the notebook interface for neat. You typically start with reading a data model or metadata from a source. Then, you do some operations on that data and/or data model, before you write the result to a destination.
!!! warning "NeatSession use for a single data model with metadata"
The `NeatSession` is intended for a single data model optionally with metadata. You
should not use it to mix multiple unrelated data models.
For example, we can read a data model from CDF and dump it to Excel.
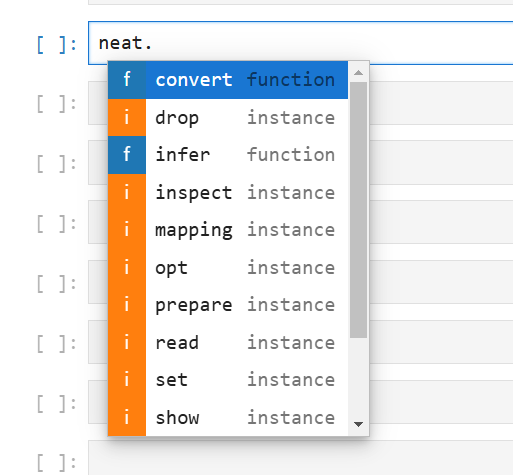
To get started we start by typing neat.<press tab> in most Notebook environments this gives us the operations available.

We select read write . and press tab again. We select cdf.data_model and write in the identifier of the data model we want to retrieve.
neat.read.cdf.data_model(("cdf_idm", "CogniteProcessIndustries", "v1"))
Success: Read NEAT(verified,physical,cdf_idm,CogniteProcessIndustries,v1)
neat
Data Model
| aspect | physical |
|---|---|
| intended for | DMS Architect |
| name | Cognite process industries data model |
| space | cdf_idm |
| external_id | CogniteProcessIndustries |
| version | v1 |
| views | 36 |
| containers | 32 |
| properties | 161 |
We see know that we have succesfully read in the data model.
We can now export the data model to a different format, for example, spreadsheets with the following command
neat.to.excel("my_first_model.xlsx")
The above command writes the data model to the file my_first_model.xlsx.
Parameters of a NeatSession
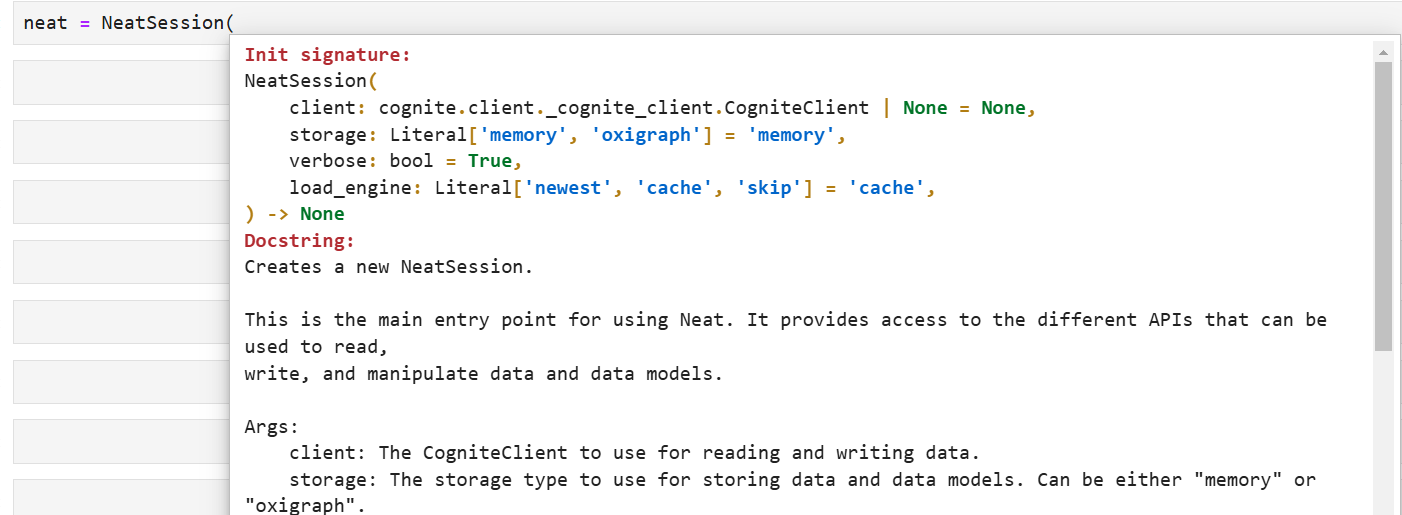
The NeatSession has several parameters we can set. We can inspect this by presing <shift>+<tab> after writing NeatSession(

This will give us the most up-to-date documentation of what is available. You can read the documentation to get more information about the parameters you can set.
!!! tip "Shift+Tab"
This shortcut works in most notebook environment for inspecting the available
arguments of a method.
You can use that in combination with `.` + tab to explore the options availabe for
using neat.neat = NeatSession(client, storage="oxigraph", verbose=True, load_engine="newest")
NeatEngine
Some of the functionality in Neat requires the NeatEngine. This is only available to Cognite customers. Contact the team to obtain access.
Alternative to get_cognite_client
The get_cognite_client is a helper method from neat that instansiate a CogniteClient from a .env or if you do not have a .env file
it will prompt you to provide the credentials and offer to create one.
If you are used to working with the cognite-sdk you can instansiate the CogniteClient in any way you which. Below are a few examples.
from cognite.client import CogniteClient
Service Principal in Microsoft Entra
cognite_client = CogniteClient.default_oauth_client_credentials(
    project="<my-cdf-project>",
    cdf_cluster="<my-cdf-cluster>",
    tenant_id="<my_domain>.onmicrosoft.com",
    client_id="<my_service_principal_client_id>",
    client_secret="<my_service_principal_client_secret>",
)
Interactive Login Microsoft Entra
cognite_client = CogniteClient.default_oauth_interactive(
    project="<my-cdf-project>",
    cdf_cluster="<my-cdf-cluster>",
    tenant_id="cognitepygen.onmicrosoft.com",
    client_id="<my_service_principal_client_id>",
)
Device Code
from cognite.client import ClientConfig
from cognite.client.credentials import OAuthDeviceCode
credentials = OAuthDeviceCode.default_for_azure_ad(
    tenant_id="cognitepygen.onmicrosoft.com",
    client_id="<device_client_id>",
    cdf_cluster="<my-cdf-cluster>",
)

cognite_client = CogniteClient(
    ClientConfig(
        client_name="client-name",
        project="<my-cdf-project>",
        credentials=credentials,
    )
)